
To create a book cover out of a brown paper grocery bag, fold the bottom flap of the bag over the front and back covers of the book. Then, use tape to flatten the book. Repeat with a second book, and then a third book, and so on. Now you have a sturdy book cover! And just like that, you’ve made your first book cover! What could be easier?
Getting the proper length
One of the first steps in making your own paper bags is to measure the length and width of your package. The length is usually the longest side of the package. If the package does not specify the exact length, you can measure the length using a ruler. To find the length of a paper bag, measure the length from the bottom to the top. Make sure you measure the length in inches. Then, fold the bag in half, from the left side to the right, and mark the center of the long sides.
Positioning tape near the side edge of the inside flap on the back of the book
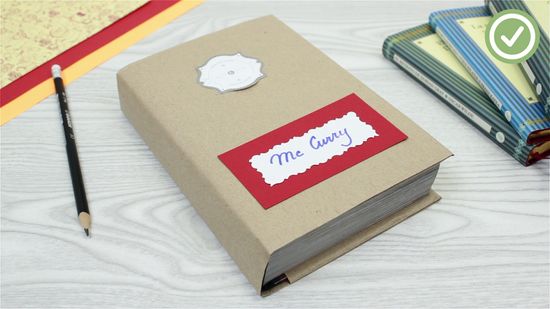
To paste a label to a book, start by placing the label on a clean paper towel. Use a Teflon folder to flatten it, then place a sheet of Mylar over it. The Mylar will prevent the label from sticking accidentally. Then, prop the back of the book open at a 90-degree angle. Position the label with the Mylar near the side edge of the back flap. Once the label is positioned on the Mylar, paste the back of the bookplate, leaving about two to three millimeters of margin.
If you have a single strip of adhesive tape, position it near the side edge of the inside flap on both sides of the book. The tape should extend past the score line 211a. If it is longer than the width of the carrier flap, it will continue to the bottom panel. The longer strip of tape should be parallel to the inner edge of the flaps. This will hold the flaps together.
Using brown paper grocery bags as a book cover
If you don’t have a lot of money to spend on a cover for your book, you can make one out of paper grocery bags. One grocery bag will cover two standard hardcovers and one small hardcover. Once you have enough bags, you can fold them in half and use the creases on the back face of the paper to make flaps on the front. Once you have the flaps, simply unfold them and you’ve got your cover.
You can also use a brown paper grocery bag to cover a small book, a textbook, or a binder. First, place the book in the center of the bag. Fold the top and bottom edges of the paper bag, and then fold the book tightly over the folded edges. You can decorate the brown paper grocery bag however you like. Just be sure that it fits snugly around your book and is not too long or too short.
Using tape to flatten a book with a paper bag
To flatten a book with a paperbag, lay down the cover side of the book on the top part of the sheet. Then, fold the top half of the book over the bottom half of the bag. Repeat this process for the remaining pages. Once the book is flattened, you are ready to use it as a binder. To do this, cut a piece of tape about three to six inches long. You don’t need the strips to be the same length. Using a ruler, scissors, or X-ACTO knife, cut the tape to size. Make sure the sheet extends over the edges of the book by a few inches.
Once you have folded the flaps of the paper bag, you should place them into the front and back covers of the book. You can then secure them with tape. It’s important to make sure that the tape doesn’t touch the book itself, as you are responsible for damages to the book while using the cover. Once this is done, you should remove the paper bag from the book. When you’re done, you should have a flattened book with no visible flaws!
Using tape to stamp a book with a paper bag
You can use paper bags as book covers. You can even tape them together and stamp them! But be sure to test the stamp on scrap paper first. Some of the letters may come out crooked, so you should test them on scrap paper first. But don’t worry, you can always use them again. This tip will help you stamp multiple books with the same cover! You just have to have patience and practice!
To begin stamping the book, place the book in the middle of the paper bag. Then, use a pencil to draw a line across the paper bag, then remove the book. Now fold the paper bag along the pencil lines, aligning the edges with the book. Once you have positioned the tape, the book will look like a stamp. Repeat these steps for as many books as you want.