
When you learn how to make mini books out of paper, you will find it much easier to create an interesting book. The steps are not complicated and can be completed by anyone, from a young child to an adult. To begin, fold a piece of paper in half. Then, hold the two halves together and push them together. The paper will form a diamond shape as you press it together. Carefully fold the paper and neaten the folds. You can use any size piece of paper, including scraps.
Staple your book sections
For thin mini books, a single-sided photocopy of the book’s pages can be used. Cut them along the horizontal line. Then stack them with the title page on top. Staple each page along the left side. Fold the front cover and back cover on the dashed line and staple along that edge. Fold the inner pages in half lengthwise and staple them together as well. When finished, trim off any excess duct tape with scissors.
To staple each section, hold the paper in place on top of the cardboard. Make sure the cover of the booklet is visible. The inner pages should be folded away because they will interfere with the fold. To use a stapler, grasp the top arm near the joint, but not the one next to the staple-deploying head. Position the stapler head over the center of the paper. Staple two or three sections at a time.
Use origami paper to make mini books
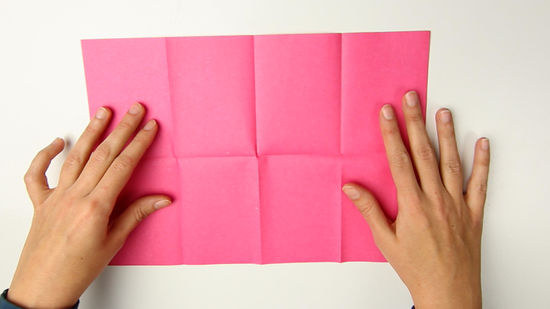
Make a cute DIY notebook with the help of origami paper. This paper craft can be a fun and easy way to practice the art of origami. First, you must fold the paper in half lengthwise and widthwise. This will form a short, fat rectangle. Fold the top flap inwards, aligning the bottom edge with the top fold. Fold the other side inwards and repeat the process. The end result should be a miniature W-shaped book. Once you have completed the folding, you may paint or draw images on the pages. You can also write and illustrate each page with happy quotes.
To start making your mini book, you will need a standard 8 1/2 by 11 piece of paper. Begin by folding it long-ways, just like a hot dog. Then, fold it short-way, like a hamburger. Then, flip the edge of the paper back over, meeting the fold. Then, crease and secure the pages together with string or staples. Make a few mini books using the same technique and have fun!
Then, fold the last row in the opposite direction of the first one. Then, fold the last row in a fan shape. Finally, sew in the pages of your mini book. Be sure to leave a margin around the cover, as the last row will form the spine. You may also use one-sided printed paper for your pocket book. You can cut the unused part and use it as a bookmark.
Add a cover to your book
If you want to make a mini book for your child, you can decorate a blank sheet of cardstock with a favorite photo or character. You can also add glitter glue, stickers, or markers to the blank pages. Repeat steps 1-7 to create more booklets. Glue them together before adding the cover. You can also use more than one sheet of paper and glue the booklets together as a single book.
Now you can make a cover for your mini book by folding the paper to fit its size. Ensure to fold the corners inward. Use a glue stick or regular white glue to attach the covers. Then, insert the cardboard piece in the center of the mini book and fold the top flaps down. If you want to make a back cover, use a different material and repeat the process.
Before you crease the covers, make sure to cut the material to fit the book. You should also allow at least two inches of excess paper on each side. To make the book look complete, make sure that the sides of the cover are folded under the book. Use gentle creases in the edges so the book appears complete. Ensure that the sides of the cover match the height of the book. You should have a paper cover that is approximately the same thickness as the book itself.